Jump to:
Word
Most schools are likely to start text programming in a text editor such as Microsoft Word. The braille reader needs to be able to navigate and edit documents efficiently.
As Word is mainly used at the beginning of programming, code texts (both pseudocode and real programming languages) are usually quite short. Therefore, students will get far by navigating through documents using the arrow keys.
If the code requires indentation, use four spaces or tab to help the student recognize how the code is written and read.
Code Jumper

Code Jumper works by physically connecting command pods to create sequence of code. Whereas traditional programs consist of written commands, each Code Jumper command pod acts as a tangible representation of those commands. In addition, each time a Command pod is connected to the Hub, a line of code appears in the Code Jumper application. When the Play button on the Hub or in the app is pressed, the sounds are played in the order in which they were arranged. Students can experiment by trial and error, testing the hypotheses either physically with the Command pods or by using the accessible application, which is compatible with screen readers.
For information on installing the program from the Microsoft Store, pairing the program with the product, and other settings, please use Code Jumper’s user guide.
Visual Studio Code
Visual Studio Code (VS Code), coupled with the Python programming language, provides good accessibility for screen reading software.
Screen Reader Optimized Mode
When VS Code detects the use of a screen reader, it automatically switches to a screen reader optimized mode for the user interface elements, including the editor and integrated terminal. You’ll notice that the status bar in the bottom right corner displays “Screen Reader Optimized”. To exit this screen reader mode, you can either click on the text displayed in the status bar or use the “Toggle Screen Reader Accessibility Mode” command (Alt + F1, then Ctrl + e). This feature improves the accessibility of Visual Studio Code for users who rely on screen readers.

Settings
There are some settings that are preferred in the braille reader’s screen reader program, Jaws. These include settings relating to indentation, speech synthesis settings, and typing echo. When navigating through code, the student may use both the braille display and speech synthesis. In this case, the speech synthesis settings should be configured to complement the braille display. This will ensure more effective and seamless navigation through the code.
Indentation
Indentation refers to the spaces at the beginning of a line of code. In some programming languages, indentation is for readability, but in Python it is essential. Python uses indentation to mark a block of code. The first code snippet below is written correctly with indentation:

However, Python will return an error if the code is written without proper indentation:

Indentation is important in Python and affects the structure and execution of the code.
While the NVDA Screen Reader includes a useful feature that uses beeps to indicate indentation levels (with deeper indentation corresponding to higher pitch), not all screen readers provide this functionality. For example, JAWS, Narrator and VoiceOver do not have a similar configuration.
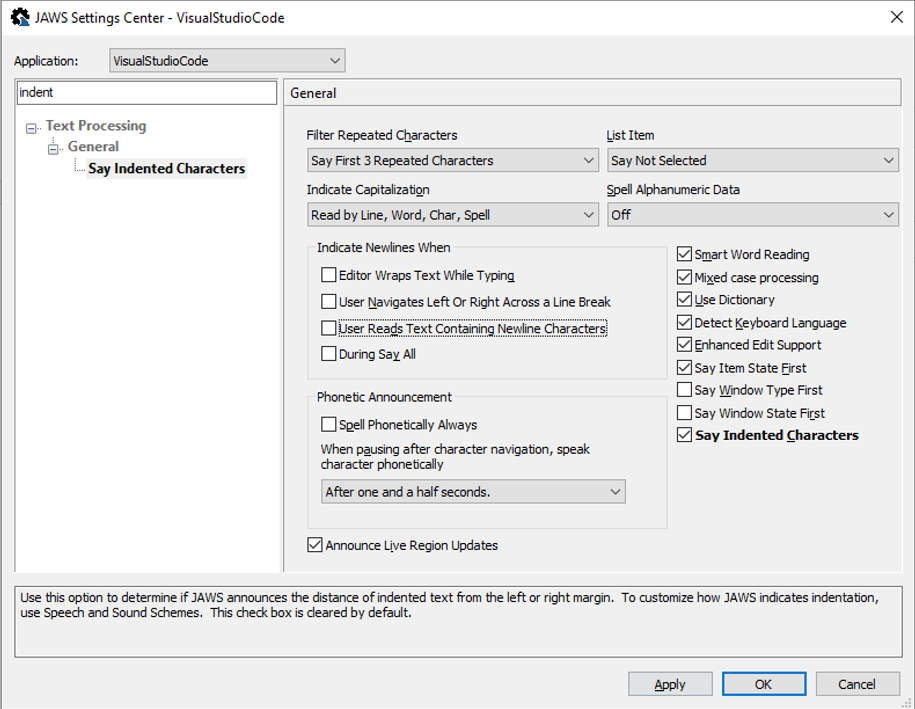
In JAWS, you can configure the screen reader to say how many spaces there are before the code in a line. Providing details on indentation makes it easier for the braille reader to understand the structure of the code. This setting causes the screen reader to say “four spaces” for single indentation and “eight spaces” for double indentation. The screen reader only articulates changes in indentation from the previous line. If a line has no indentation but the previous line does, the screen reader will announce “left margin”. These indentation patterns are also reflected on the braille display, which uses spaces in front of the code.
Change the setting in Jaws while in the VS Code program:
- Press Insert + F2.
- Open the Settings Center and search for “Indent”.
- Tick the box “Say Indented Characters”.
Speak All Punctuation
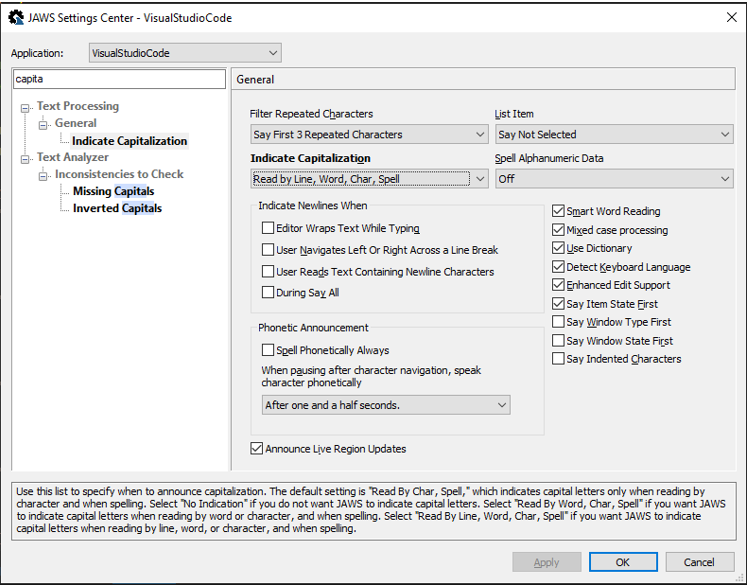
Change the setting to speak all punctuation, as every character is important in programming.
This is done in JAWS by following these steps:
- Press Insert + j.
- Navigate to Options -> Voices -> Voice Adjustment.
- Either create a new voice profile specifically for programming sessions or modify the existing voice profile.
- Change Punctuation to “All”.
Indicate Capitalization When Using Speech Synthesis
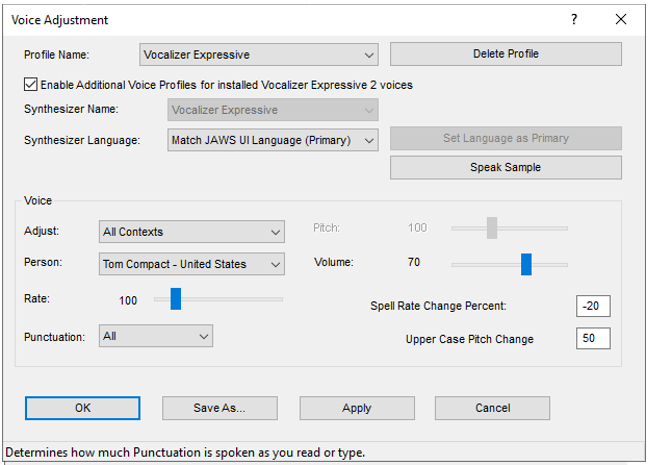
It is possible to have the screen reader indicate with a sound change when a capital letter is used during reading. Some braille readers find this helpful when programming, as most programming languages are case sensitive.
When in VS Code (the settings will only work in this program):
- Press Insert + F2.
- Go to Settings Center.
- Search for “Capitalization” (under “Text Processing”, “General”).
- Set Indicate Capitalization to “Read by Line, Word, Char, Spell” and save changes.
Typing Echo
When typing code, it can be helpful to have an echo for characters as well as words:
This is done in the VS Code program by following these steps:
- Press Insert + F2.
- Go to Settings Center.
- Search for “Echo” (under “User”).
- Set Typing Echo to “Character and Words”.

Navigation
In VS Code, there are two central areas when coding: the code editing area and the terminal, where the execution of the code is displayed. The easiest way to navigate between these different areas is to use the F6 key.
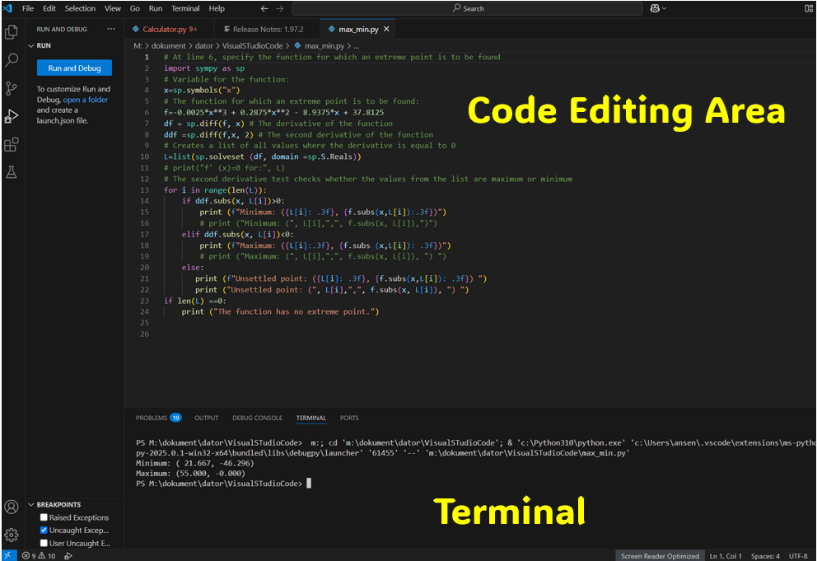
Code Editing Area
In Visual Studio Code, each line of code is assigned a line number, making it easy to reference specific parts of the code by providing the line number. For example, error messages and references in the code include line and column numbers to pinpoint the locations.
However, the visual line numbers displayed at the beginning of each line of code are not conveyed to braille readers using screen readers, either audibly or on the braille display. Despite this limitation, users can determine the line number corresponding to the cursor position by using the command to navigate to a specific line, which is Ctrl + g.
When this command is used, the screen reader announces the current line number, and it is also displayed on the braille display. To return to the code interface, the user simply presses the Escape key.

The Ctrl + Shift + § command in Visual Studio Code is useful for navigating between related parentheses, helping to identify the start and end of blocks of code. This is particularly helpful for braille readers, as it provides a quick way to locate matching parentheses and avoid problems such as missing parentheses in the code. The simultaneous movement of the cursor on the braille display enhances the understanding of code structure.

Run the Code and Get the Output in the Terminal
Execute the code by pressing Ctrl + F5. Press F6 to move the focus to the terminal panel. To read the content of the terminal as a screen reader, use Alt + F2 to open an accessible terminal view. This will enable the screen reader to read the text displayed in the terminal. Use the arrow keys to navigate through the text. To close the accessible view of the terminal, press the Escape key.
To return to the code, use the keyboard shortcut Shift + F6. This will move the focus back to the code editing area and the screen reader will say the name of the code file when the focus is on the code.
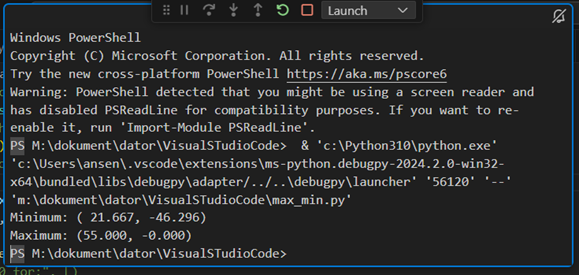
Running Code From the Command Prompt
Some users prefer to write code in VS Code and then save the file to run the program from the command prompt. This process involves a few commands to navigate to the correct folder where the saved file is located and then run the program.
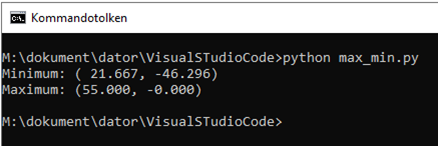
To read the various lines in the command prompt, use the “Route JAWS Cursor to PC Cursor”, which can be activated with the keyboard shortcut Ins + NumPadMinus. The braille reader can then use the up and down arrow keys to navigate between the lines and read the content. When you’ve finished reading, switch back to “Route PC cursor to JAWS cursor” (Ins + NumPadPlus).
Learn more about Visual Studio Code and accessibility.
Exercise: Navigation in Visual Studio Code With Jaws
The aim of this exercise is to navigate in Visual Studio Code (VS Code) using the screen reader Jaws. This includes opening an existing code file, reading and executing it, and viewing the output in the terminal. Then you will edit the code, save it and check the new result.
- Open VS Code. Ask the student to open an existing file (Ctrl + o) with, for example, this code:

Screenshot of an example code in Visual Studio Code
- Navigate through the eight lines of code and read or listen to each line. Can you hear and feel when the code is indented (spaces at the beginning of the line)?
- Go to line 6 by pressing Ctrl + g and typing “6”, then pressing Enter. Did you notice the information about your current line when you used the Ctrl + g command?
- As the tutor, move to line 3 using the up-arrow key. Ask the braille reader to identify which line the cursor is on. If the student needs help, instruct to use the Ctrl + g command and listen (or read on the braille display).
- Run (execute) the code using Ctrl + F5.
- Press F6 to go to the terminal where the output of the code is displayed.
- Use the Alt + F2 command to read the information in the terminal more easily. Use the arrow keys to navigate through the text. Moving up one line will give you the output of that code, but sometimes there is more than one line to read. Use Escape to close the easy-read window. You are still in the terminal area.
- Use Shift + F6 to return to the code area. You are in the right place when you hear the speech synthesis say the name of the open file.
- Go to line 6 and edit the code, e.g. delete “1000” and type in “20000”.
- Save the code (Ctrl + s), run the code and check if the answer in the terminal has changed.
- Close VSC (Alt + F4).
